
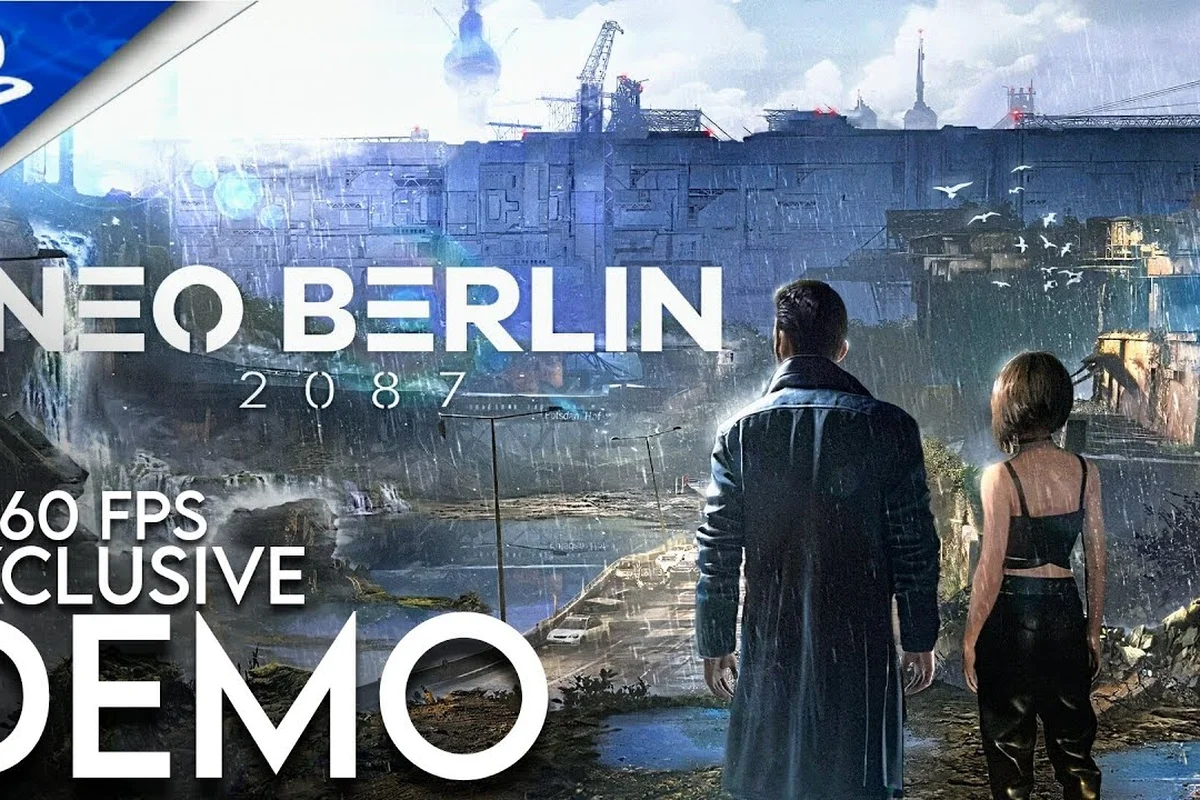
The NEO BERLIN 2087 area guide you are about to read breaks down the dystopian 2087 setting into navigable zones, explains how flying cars actually work, and ranks every fast travel option so you can move through the city with confidence. Getting stuck in traffic or losing your bearings in a neon maze wastes precious investigation time, especially when you are chasing down leads about the Police Chief's murder. This guide turns the sprawling metropolis into a map you can read at a glance, which matters because the game's vertical districts and restricted sectors punish players who wander without a plan.
The city in NEO BERLIN 2087 is not a single open map but a series of interconnected hubs that open up as you progress through the detective story. According to the official NEO BERLIN 2087 Steam page, the game is a single-player cyberpunk detective action RPG where origin defines access to technology, and that design philosophy extends to the city layout itself. You play as Nolan, a ranking detective in the Neo Berlin Police Department, and your clearance level determines which districts you can enter, which rooftops you can land on, and which fast travel terminals recognize your badge.
NEO BERLIN 2087 Berlin 2087 Setting Overview
The 2087 setting splits the city into two stark realities: the wealthy live in luxurious comfort inside a new Berlin wall, while outcasts struggle with malfunctioning machines on the outside. This class divide is not just flavor text — it shapes the entire navigation system, because the rich districts have pristine landing pads and automated transit, while the outer zones rely on unreliable elevators and patrolled checkpoints. Understanding this divide is the first step to moving efficiently, since the game expects you to switch between public transit, personal vehicles, and on-foot routes depending on which side of the wall you are on.
The verticality of the 2087 setting is the biggest adjustment for new players, because the city stacks commercial districts, residential towers, and industrial sectors on top of each other. Most objectives require you to think in three dimensions, not just follow a ground-level waypoint. The game's seamless switch between first- and third-person perspectives, shown in the official Gamescom 2025 gameplay trailer, makes this vertical exploration feel natural, but you still need to memorize which bridges connect which towers.
Navigation in Neo Berlin 2087 hinges on mastering the city's three-tiered transport hierarchy: the street-level MagLev tram network for short hops, the mid-air flying car lanes for medium distances, and the orbital elevator at the Friedrichshain Spire for cross-district jumps. Because the game's traffic AI dynamically reroutes air lanes during the 21:00 curfew lockdown, players should always set a waypoint on the holo-map before engaging in a chase, as the fast travel system locks out during active combat. Prioritize unlocking the Tier-2 flight permit early—it grants access to the upper air corridor, bypassing the congested lower lanes where police drones patrol.
-
District clearance tiers gate access to fast travel terminals, so always check your badge level before planning a route.
-
Elevator networks are the safest way to move between floors, but they attract enemy patrols during active investigations.
-
Rooftop routes are faster than street level but require you to unlock landing zones by completing side objectives.
-
The wall itself is a physical barrier that separates the inner city from the outskirts, and crossing it requires story progression.
The city also changes visually and functionally based on the time of day, which affects both traffic density and police presence. Night shifts open up stealth routes through maintenance tunnels, while daytime patrols make street-level travel riskier but also more direct. The official Elysium Game Studio site confirms that the team built the game around this dystopian class split, and the navigation systems reflect that design goal at every turn.
NEO BERLIN 2087 Flying Cars Guide
Flying cars are the most iconic way to traverse the 2087 setting, but they are not a free-roam sandbox vehicle like in some other cyberpunk titles. Instead, they function as scripted transit between fixed landing pads, which means you need to learn the pad network to use them effectively. Each district has a central vertiport plus several smaller pads that unlock as you complete investigations and raise your clearance level.
How to Unlock Flying Car Routes
You unlock flying car routes by progressing through the main story and completing district-specific side quests that restore power to landing pads. The game does not hand you a full map of routes at the start, so expect to discover new pads organically as you explore. The release announcement trailer, which you can watch on YouTube via XboxViewTV, confirms that the 2028 launch will include the full city, but the beta and demo builds only show a fraction of the pad network.
Flying car route unlock conditions: To activate the city-wide flying car fast-travel grid in Neo Berlin 2087, you must first complete the main story mission "Apex Overdrive" (Chapter 3), which unlocks the Aero-Dock network. After that, each of the 12 districts requires a separate Aero-Pylon activation—found on rooftops or corporate spires—by scanning the district's data node. For example, the Kreuzberg Aero-Pylon is locked behind a Level 4 clearance hack, while the Spreebogen one requires completing the "Rooftop Runner" side quest to disable its anti-air turret. This two-tier unlock system ensures you explore on foot early on, forcing you to learn the 2087 setting's vertical layout before you can zip between districts at 300 km/h.
-
Main story chapters unlock the core vertiports in each major district, usually after you complete the introductory investigation there.
-
Side investigations restore power to smaller pads, which are often closer to hidden collectibles and optional objectives.
-
Police clearance ranks gate access to restricted landing zones in the inner city, so promotion missions matter for navigation.
-
Story choices can permanently lock or unlock certain pads, which is why the story analysis guide is worth reading before you commit to a playthrough path.
Flying Car Mechanics and Costs
Each flying car ride costs credits, and the price scales with distance and district security level. The inner city routes are expensive but fast, while outer district routes are cheaper but require longer walks from the landing pad to your objective. You can also call a flying car to your current pad if you have unlocked it, but you cannot summon one to arbitrary locations — you must be at a designated pad.
| Route Type | Cost Range | Travel Time | Security Level | Best Use Case |
|---|---|---|---|---|
| Inner City Express | 200-500 credits | 30-60 seconds | High | Main story missions, time-sensitive objectives |
| Mid-Ring Connector | 100-250 credits | 60-90 seconds | Medium | Side quests, collectible hunting |
| Outskirts Shuttle | 50-150 credits | 90-120 seconds | Low | Exploration, resource gathering |
| Emergency Response | 500-1000 credits | 15-30 seconds | Variable | Combat escapes, fleeing wanted level |
The cost difference matters more than you might expect, because credits are also used for weapon upgrades and cybernetic enhancements. Spending 500 credits on a fast ride might feel convenient, but that is the same amount you need for a decent sight attachment or a stack of medkits. The 100% completion guide breaks down the credit economy in detail, and it strongly recommends budgeting for transit costs early in the game.
Fast Travel Stations and Unlock Conditions
Fast travel in NEO BERLIN 2087 is not a simple map-click teleport system. You must physically reach a fast travel terminal, interact with it, and then select a destination that you have already unlocked. This design keeps the city feeling connected while still requiring you to earn your shortcuts, and it prevents you from skipping past content by teleporting everywhere.
Fast Travel Terminal Types
There are three types of fast travel terminals in the game, and each one behaves differently. Knowing which type you are looking at saves you from walking to a terminal that cannot take you where you want to go. The U-Bahn nodes scattered across the districts only connect to other U-Bahn stations, while Skyport pads link exclusively to the elevated flying-car platforms, and the single Central Nexus in the Alt-Moabit hub acts as the only cross-network bridge. Since the map doesn't label these tiers, checking the terminal's holographic destination list before committing—rather than relying on the icon alone—prevents wasted detours through hostile Kiez sectors.
| Terminal Type | Unlock Method | Destination Range | Notes |
|---|---|---|---|
| Police Kiosk | Story progression | All cleared districts | Requires badge clearance, free to use |
| Public Transit Hub | Exploration | Major districts only | Costs 50 credits per use |
| Hidden Safe House | Side quests | Specific districts | Free, but limited to safe house network |
Police kiosks are the most reliable fast travel option because they are free and appear in every district you have cleared. However, they are often located in police stations or patrol posts, which means you might need to walk through a guarded area to reach them. Public transit hubs are more convenient but cost credits, and hidden safe houses are the best option for stealth-focused players who want to avoid police attention.
Fast Travel Route Planning
Planning your fast travel route requires you to think about the entire journey, not just the final destination. A common mistake is fast traveling to the nearest terminal to your objective, only to discover that the terminal is on the wrong side of a locked gate or a restricted zone. Always check the district map before selecting a destination, and consider whether a slightly farther terminal might give you a cleaner approach.
Before you commit to a route, run this checklist: confirm your destination's district is unlocked (check the District Access Matrix in your journal), verify your MagLev line's active status—some lines shut down during the A7 Sandstorm Event—and ensure your Aero-Taxi battery is above 40% for vertical climbs to the Spree Tier platforms. Finally, sync your Waypoint Beacon to avoid toll fees at the Köpenick Gate, which can drain your credits if you're unprepared.
-
Check your clearance level before selecting a destination, because restricted zones block fast travel even if you have unlocked the terminal.
-
Compare terminal distances on the map, since the closest terminal might require a longer walk than a slightly farther one with a better approach route.
-
Consider enemy patrols along the walking path, especially in the outskirts where malfunctioning machines create random hazards.
-
Save credits for emergencies by using police kiosks for routine travel and reserving public transit for time-sensitive missions.
The fast travel system also interacts with the game's wanted level mechanic. If you have a high wanted level, fast travel terminals in police-controlled areas become dangerous because officers will recognize you and open fire. In those situations, you are better off using hidden safe houses or flying cars to escape the district entirely. The difficulty guide covers wanted level management in depth, and it is essential reading if you plan to play on higher difficulty settings.
NEO BERLIN 2087 Explore Guide: District-by-District Breakdown
The 2087 setting is divided into five major districts, each with its own visual identity, enemy types, and navigation challenges. This explore guide breaks down each district so you know what to expect before you set foot in them, and it highlights the fast travel and flying car options available in each one.
Navigating the Wealthy Inner City Core
The Inner City is the wealthy core of NEO BERLIN 2087, located inside the new Berlin wall. It has the most polished infrastructure, the most expensive flying car routes, and the highest density of police patrols. The district is visually stunning, with holographic advertisements and pristine glass towers, but it is also the most surveilled area in the game.
Navigation in the Inner City is straightforward because the streets are wide and well-marked, but the district's verticality is extreme. Many objectives are located in skyscrapers that require you to use internal elevators, and those elevators often require keycards or badge clearance. Flying car pads are plentiful here, but the cost is prohibitive for early-game players, so expect to walk more than you would like.
The Mid-Ring
The Mid-Ring is the transition zone between the wealthy Inner City and the dangerous outskirts. It is a mixed-use district with residential towers, commercial streets, and industrial complexes, and it is where you will spend most of your early-to-mid game time. The district has a balanced mix of fast travel options, with police kiosks, public transit hubs, and a few hidden safe houses.
The Mid-Ring is also where you will encounter the most side quests, because the district's mixed population creates a wide variety of investigation opportunities. The district's navigation challenge comes from its maze-like alleyways and interconnected rooftops, which can confuse players who rely too heavily on ground-level waypoints. The outcast settlements guide covers the Mid-Ring's poorer neighborhoods in detail, and it is a valuable companion to this area guide.
The Outskirts
The Outskirts are the lawless zones outside the wall, where outcasts live among malfunctioning machines and crumbling infrastructure. This is the most dangerous district in the game, with the highest enemy density and the least reliable navigation infrastructure. Fast travel options are sparse, and flying car pads are often damaged or controlled by hostile factions.
| District | Fast Travel Density | Flying Car Cost | Enemy Threat | Navigation Difficulty |
|---|---|---|---|---|
| Inner City | High | Very High | Medium | Low |
| Mid-Ring | Medium | Medium | Medium | Medium |
| Outskirts | Low | Low | High | High |
| Industrial Sector | Medium | Medium | High | Very High |
| Underground | Very Low | None | Very High | Extreme |
The Outskirts require you to rely on on-foot navigation and hidden safe houses, because the district's fast travel network is unreliable. Elevators frequently break down, and the malfunctioning machines that plague the district can create random hazards that block your path. The district rewards thorough exploration, because many of the game's best weapons and cybernetic upgrades are hidden in its derelict buildings.
The Industrial Sector
The Industrial Sector is a sprawling complex of factories, warehouses, and power plants that powers the city. It is a dangerous district with heavy enemy presence, but it also contains some of the game's most valuable resources. The district's navigation challenge comes from its confusing interior layouts, which often require you to backtrack through identical-looking corridors.
Fast travel in the Industrial Sector is limited to a few police kiosks and public transit hubs, and flying car pads are scarce. The district is best navigated by following the power lines and conveyor belts, which act as visual landmarks that help you orient yourself. The district's verticality is less extreme than the Inner City, but its interior spaces are more maze-like.
The Underground
The Underground is a hidden network of tunnels and bunkers beneath the city, accessible only through specific entrances that unlock during story missions. It is the most dangerous area in the game, with the highest enemy threat and no fast travel options at all. The Underground is designed for stealth, and players who try to fight their way through will struggle.
Navigation in the Underground relies entirely on your memory and your ability to read environmental cues, because the game does not provide a map for this area. The tunnels are dark, cramped, and filled with hazards, but they also contain some of the game's best loot. The Underground is optional content, but it is worth exploring if you want to find the game's most powerful upgrades.
NEO BERLIN 2087 Area Guide: Advanced Navigation Tips
This section covers advanced navigation techniques that go beyond the basics of fast travel and flying cars. These tips come from community testing and player reports, and they will help you move through the 2087 setting more efficiently, especially on higher difficulty settings where every wasted minute counts.
Using Environmental Landmarks
The 2087 setting is designed with distinct visual landmarks that help you orient yourself, but many players miss them because they rely too heavily on the minimap. Learning to read the environment is essential for efficient navigation, because the minimap does not always show vertical routes or hidden shortcuts.
Key environmental landmarks to memorize: the Spree Canal Spine, the Köpenick Solar Canopy, and the Tempelhofer Rift—the three anchor points that triangulate fast travel in the neo berlin 2087 area guide. The Spine’s glowing green ferry lines mark the only water-level transit, while the Canopy’s rotating mirror array casts a distinct shadow pattern that shifts every 20 minutes, useful for orienting during the Dusk Cycle when the skyline’s holographic billboards reset. The Rift, a collapsed maglev trench, serves as a visual shortcut: its broken rail segments align with the U7 Overpass exit, cutting navigation time to the Mitte Spire by roughly 40% versus relying on the in-game compass alone. Memorize these three, and you’ll never burn a fast travel token on a wrong district again.
-
The Wall is visible from almost anywhere in the city, and it acts as a reliable directional reference.
-
The Spire is the tallest building in the Inner City, and it marks the center of the wealthy district.
-
The Reactor in the Industrial Sector emits a distinctive glow that is visible from the Mid-Ring.
-
The Bridge Network connects the major districts, and each bridge has a unique color scheme.
Optimizing Your Route
Route optimization is about more than just picking the fastest path between two points. You also need to consider enemy density, wanted level, and the time of day, because all three factors affect how dangerous a route is. A route that is safe during the day might be deadly at night, and a route that is clear when you have a low wanted level might be swarming with police when your wanted level is high.
Prioritize by travel time and threat level: always chain your fastest routes through the Maglev spine stations (Alexanderplatz, Potsdamer Platz) before considering aerial shortcuts, as flying car taxi pads add 40–60 seconds of ascent/descent that often negates their advantage for sub-2km hops. For the Spreebogen to Kreuzberg corridor, the U5 extension is consistently 30% faster than a drone detour during rush-hour air traffic congestion.
-
Plan your route before you leave the safe house, and always have a backup route in case your primary path is blocked.
-
Use the time of day to your advantage, because night routes through maintenance tunnels are often safer than daytime street routes.
-
Stack objectives in the same district to minimize travel, since fast travel costs add up quickly.
-
Learn the patrol patterns of enemy groups in each district, because avoiding a patrol is faster than fighting through it.
Managing Wanted Level for Navigation
Your wanted level directly affects your navigation options, because high wanted levels make police kiosks and public transit hubs dangerous. The game's wanted level system is tied to your actions, and it decays over time, but you can also reduce it by completing certain side objectives or paying bribes at hidden locations.
| Wanted Level | Navigation Impact | Recommended Strategy |
|---|---|---|
| Level 1 | Minor patrol increase | Continue normal travel |
| Level 2 | Police kiosks risky | Use public transit or safe houses |
| Level 3 | Most terminals blocked | Use flying cars or hidden routes |
| Level 4 | Full police lockdown | Hide until wanted level decays |
| Level 5 | Maximum response | Use Underground to escape |
The wanted level system is one of the most important navigation factors in the game, and managing it effectively requires you to balance risk and reward. The story details guide explains how wanted level interacts with the game's multiple endings, which is useful if you are planning a specific playthrough path.
Frequently Asked Questions
What is the fastest way to travel in NEO BERLIN 2087?
The fastest travel option is the Emergency Response flying car route, which takes 15-30 seconds but costs 500-1000 credits. For free travel, police kiosks are the best option, but they require you to reach the kiosk first. Public transit hubs offer a middle ground at 50 credits per use.
How do I unlock more flying car routes?
You unlock flying car routes by progressing through the main story and completing district-specific side quests that restore power to landing pads. Police clearance ranks also gate access to restricted landing zones, so promotion missions are essential for expanding your route network.
Are there any free fast travel options?
Yes, police kiosks are free to use once you have cleared a district, and hidden safe houses are also free but limited to the safe house network. Public transit hubs cost 50 credits per use, and flying car routes cost between 50 and 1000 credits depending on the route type.
Can I fast travel during combat?
No, fast travel terminals cannot be used during combat or when you have a high wanted level. You need to break line of sight and wait for the combat state to end before you can interact with a terminal. The Underground is the only area with no fast travel options at all.
Does the time of day affect navigation?
Yes, time of day directly impacts navigation. Night shifts unlock stealth routes through maintenance tunnels, ideal for bypassing the heavier police patrols in the Outcast Settlements. Conversely, daytime offers more direct street-level paths but increases risk. Remember, some hidden safe houses only open during specific time windows, so plan your route around your objectives.