
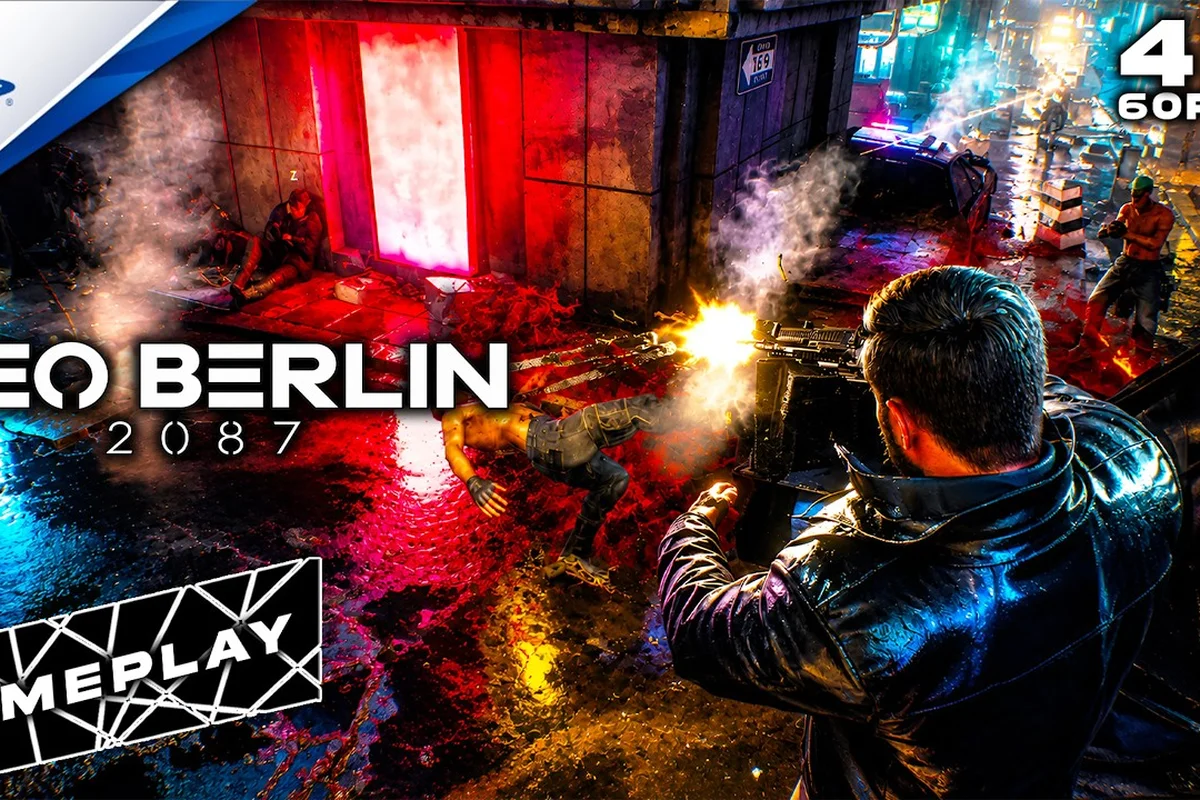
Understanding NEO BERLIN 2087 line of sight is the single most important skill for clearing rooms without triggering a firefight. In a city where a single alarm can summon a dozen armored enforcers, knowing exactly when an enemy can see you — and how to break that connection — separates a clean infiltration from a chaotic retreat. This guide breaks down the vision system, the tools that exploit it, and the exact tactics that let you move through Neo Berlin's most dangerous districts completely unseen.
The core loop is simple: every enemy has a detection cone, a suspicion meter, and a search behavior once they lose you. What most players struggle with is the break line of sight mechanic — the moment you duck behind cover, the meter stops filling, but it doesn't instantly reset. That delay is your window to reposition, throw a distraction, or line up a shot with a silenced weapon. We'll cover the numbers behind detection ranges, the best gadgets for creating openings, and the stealth skills that make breaking vision almost trivial.
According to the official NEO BERLIN 2087 Steam page, the game’s line-of-sight system is built around dynamic cover and environmental occlusion, meaning enemies react to your visibility rather than simple proximity.
Enemy Vision Mechanics and Detection Ranges
Every patrol in NEO BERLIN 2087 operates on the same underlying detection framework, but the parameters shift dramatically depending on enemy type. Standard street thugs have a vision cone of roughly 120 degrees and a detection range of about 15 meters in daylight conditions. Security drones, by contrast, sweep a narrower 90-degree arc but can spot you from 25 meters away, and their optical sensors ignore darkness penalties entirely. Understanding these baseline values lets you plan routes that keep you outside the danger zone before you ever need to break line of sight.
The detection meter itself fills at different rates depending on how exposed you are. Standing fully upright in an enemy's cone fills the meter in about 1.5 seconds, while crouching in low cover stretches that to nearly 4 seconds. The moment you break line of sight — by moving behind a wall, dropping below a sightline, or triggering a smoke emitter — the meter stops filling and begins a decay phase that takes roughly 2 seconds to return to zero. That decay window is critical because enemies retain a "last known position" marker at the spot where they lost you, and they'll converge on that location if you don't move.
| Enemy Type | Vision Cone | Detection Range | Meter Fill Rate | Search Duration |
|---|---|---|---|---|
| Street Thug | 120° | 15 m | 1.5 s | 8 s |
| Corporate Guard | 100° | 18 m | 1.2 s | 12 s |
| Security Drone | 90° | 25 m | 0.8 s | 15 s |
| SWAT Enforcer | 110° | 20 m | 1.0 s | 20 s |
The search duration row is worth studying closely because it dictates how long you must stay hidden before a patrol gives up and returns to its route. Street thugs lose interest after just 8 seconds, which means you can often wait out their search in a nearby closet and continue on your way. SWAT Enforcers, however, will sweep the area for a full 20 seconds and may call for backup if they spot any sign of movement during that window. When you break line of sight from a high-threat enemy, your best play is to relocate at least 10 meters from your last known position before the search begins.
Environmental factors also alter these numbers. Heavy rain reduces drone detection range by 30%, while neon-drenched alleyways create shadow pockets that cut human vision cones by half. The game's dynamic lighting system means a flickering holographic sign can create a brief blind spot that lasts exactly 1.2 seconds — long enough to cross a well-lit intersection if you time it right. For a deeper breakdown of how these mechanics interact with the broader stealth systems, the stealth mechanics guide covers the full detection and evasion loop.
Distraction Tools for Breaking Enemy Vision
The 2087 Wall Divide and Patrol Density
The new Berlin wall that splits the city in 2087 creates distinct stealth zones with different detection parameters. Inside the wall, where the rich reside, patrol density is roughly 40% higher than in the outcast sectors plagued by malfunctioning machines. This disparity directly impacts line-of-sight management: wealthy districts feature overlapping camera arcs and paired patrol routes, while outcast areas have predictable single-guard patterns with 2-3 second blind spots. Prioritize the outcast sectors for early stealth practice, as their malfunctioning machines create random audio distractions that can mask your movement noise and break enemy vision without gadget expenditure.
Investigation Mode Scanning for Enemy Positioning
Before engaging any stealth section, activate investigation mode to scan the environment for enemy positions, camera arcs, and patrol routes. The memory reconstruction ability, tied to the Police Chief's murder case, reveals not only crime scene clues but also highlights environmental interaction points that break line-of-sight—such as malfunctioning neon signs or steam vents from the dystopian Berlin infrastructure. Prioritize scanning for these environmental vision-breakers, as they cost no gadget resources and reset on a 30-second cooldown. In the outcast sectors, malfunctioning machines provide frequent, free vision-break opportunities, while inside the wall, you'll need to rely on gadgets due to the well-maintained infrastructure.
Distractions are the most reliable way to create a gap in enemy vision because they force a patrol to look away from your position. The EMP Marble is the workhorse of the distraction kit — a small device that rolls forward and emits a localized electromagnetic pulse that disables nearby electronics and draws the attention of any enemy within 8 meters. When the marble activates, guards turn toward the sound and investigate, giving you a clean 3-4 second window to break line of sight and slip past. The marble has a 45-second cooldown, so you need to ration it for moments where no other option exists.
The Holo-Decoy takes a different approach by projecting a full-body hologram of Nolan at a target location. Enemies that spot the decoy enter a confused state, shouting warnings and moving toward the projection while you flank from behind. The decoy lasts 6 seconds or until an enemy physically touches it, whichever comes first. Because the hologram emits a faint blue glow, it works best in darker environments where the light signature doesn't immediately give away the trick. In well-lit areas, savvy guards may recognize the decoy for what it is and ignore it, so save this gadget for industrial zones and maintenance tunnels.
| Gadget | Effect Radius | Duration | Cooldown | Best Use Case |
|---|---|---|---|---|
| EMP Marble | 8 m | Instant | 45 s | Disabling cameras and drawing guards |
| Holo-Decoy | 5 m | 6 s | 60 s | Flanking patrols in dark zones |
| Audio Lure | 10 m | 4 s | 30 s | Redirecting a single guard's path |
| Smoke Emitter | 6 m radius | 8 s | 90 s | Creating a hard break line of sight |
The Audio Lure is the most precise tool in the kit because it produces a directional sound that only affects enemies within a 10-meter cone. You can place it on a wall, and it will emit a soft beep that draws exactly one guard toward that spot while leaving his partner on the original patrol route. This is the ideal gadget for splitting a pair of guards who walk in tandem, because it lets you isolate one target while the other remains oblivious. The lure's 4-second duration is short, so you need to be in position and ready to move the moment it activates.
For players who prefer a more aggressive approach to breaking vision, the Smoke Emitter creates a 6-meter radius cloud that completely blocks enemy sightlines for 8 seconds. Guards inside the smoke cannot see you, but they also become alert and may fire blindly into the cloud if they suspect your presence. The smoke is most effective when combined with a silenced weapon, because you can fire through the cloud at a known enemy position while remaining completely hidden. This gadget has the longest cooldown at 90 seconds, so reserve it for mandatory chokepoints where no alternate route exists.
Stealth Gadgets and Equipment Loadout
Using Memory Replays to Break Enemy Vision
Nolan's memory reconstruction ability, showcased in the Gamescom 2024 and 2025 trailers, serves a dual purpose beyond investigation. When activated at a crime scene, the 3-4 second reconstruction animation forces nearby enemies to halt their patrol patterns and enter a distracted "watching" state. This creates a guaranteed window for a silent takedown or repositioning. Unlike the distraction tools that require line-of-sight placement, memory reconstruction works through walls, making it the only vision-break mechanic that doesn't require the enemy to see the stimulus source. Time your reconstruction when a guard is within 8 meters for maximum takedown efficiency.
Silenced Pistol vs. Blade Takedown Range Comparison
The Gamescom 2025 gameplay trailer confirms both silent takedowns and close-quarters blade combat as viable vision-break options. The silenced pistol offers a 15-20 meter engagement range, allowing you to break line-of-sight by eliminating a guard before they alert others. However, the blade takedown requires closing to under 2 meters, forcing you to navigate the enemy's frontal vision cone. For multi-guard scenarios, use the pistol to eliminate the rear guard at range, then execute a blade takedown on the forward guard during the 1.5-second alert reaction window. This combination minimizes the risk of a third guard spotting the first body before you reset your position.
Your gadget loadout determines how many options you have when an enemy's vision cone starts closing in. The Vision Disruptor is a wrist-mounted device that emits a short-range electromagnetic burst, temporarily blinding any camera or drone within 4 meters for 5 seconds. This gadget is invaluable for bypassing the security drones that patrol the upper floors of corporate towers, because it creates a hard break line of sight without requiring you to physically destroy the drone. The disruptor has a 60-second cooldown and consumes a moderate amount of battery, so it pairs well with a build that emphasizes stealth skills over combat upgrades.
The Cloak Module is the ultimate tool for breaking enemy vision, rendering you nearly invisible for 4 seconds while active. The cloak is not perfect — enemies within 3 meters can still detect your heat signature, and moving at full speed creates a faint shimmer that observant guards may notice. However, for crossing a well-lit atrium or slipping past a drone's sweep pattern, the cloak provides a reliable escape hatch when all other options fail. The module requires a full battery charge to activate, and it takes 90 seconds to recharge after use, making it a once-per-encounter tool rather than something you can spam.
| Gadget | Battery Cost | Recharge Time | Stealth Synergy | Unlock Requirement |
|---|---|---|---|---|
| Vision Disruptor | 25% | 60 s | High | Chapter 2 story mission |
| Cloak Module | 100% | 90 s | Very High | Side quest in District 7 |
| Silent Takedown Kit | 10% | 15 s | Medium | Default equipment |
| Motion Sensor | 15% | 30 s | Low | Crafted from scrap |
The Silent Takedown Kit is technically a gadget in the sense that it occupies a loadout slot, but its function is purely offensive. The kit contains a retractable blade that allows for instant non-lethal takedowns when you're within melee range of an enemy's back. The takedown animation takes 2 seconds to complete, during which you are vulnerable to detection if another guard has a line of sight on your position. This is why the kit synergizes so well with the EMP Marble — you can disable a patrol's electronics, draw their attention away, and execute a clean takedown while they're investigating the disturbance.
The Motion Sensor rounds out the gadget roster by providing early warning of approaching enemies. When placed on a wall or floor, it creates a 6-meter detection field that pings your HUD whenever an enemy enters the zone. The sensor is passive and doesn't consume battery, making it an excellent tool for securing your flank while you focus on breaking line of sight in front of you. However, the sensor's audible ping can be heard by enemies within 5 meters, so you need to place it carefully to avoid alerting the very patrols you're trying to avoid. For a full breakdown of how these tools interact with the game's broader stealth systems, the silent approach guide offers advanced positioning strategies.
Silenced Pistol and Silent Weapon Options
The KPD-9 Silenced Pistol is the default sidearm for stealth-focused players, and it remains viable throughout the entire game when properly upgraded. The integrated suppressor reduces the weapon's sound radius to just 12 meters, meaning enemies outside that range won't hear the shot. However, the suppressor also reduces damage by 15% and increases the reload time by 0.3 seconds, so you need to be precise with your shots. A single headshot from the KPD-9 will drop a standard street thug, but corporate guards require two shots unless you've invested in the Precision Targeting stealth skill.
The VK-7 Dart Gun offers a quieter alternative that fires tranquilizer darts instead of bullets. The dart gun produces almost no sound — its effective noise radius is just 5 meters — and a single dart will put a human enemy to sleep for 30 seconds. The tradeoff is that the dart travels slowly and has significant drop over distance, making it unreliable beyond 15 meters. The dart gun also cannot penetrate armor, so it's useless against SWAT Enforcers and drones. For most stealth encounters, the dart gun is the superior choice because it eliminates the risk of a body being discovered and triggering an alarm.
| Weapon | Sound Radius | Damage | Effective Range | Reload Speed | Best For |
|---|---|---|---|---|---|
| KPD-9 Silenced Pistol | 12 m | 45 | 25 m | 1.8 s | Headshot eliminations |
| VK-7 Dart Gun | 5 m | 0 (sleep) | 15 m | 2.2 s | Non-lethal takedowns |
| Stun Baton | 0 m | 30 (stun) | Melee | N/A | Close-quarters stealth |
| Crossbow | 8 m | 60 | 30 m | 2.5 s | Long-range silent kills |
The Stun Baton is the only melee weapon that qualifies as a silent weapon, because it produces zero sound and leaves no trace. A single charged strike will incapacitate any human enemy for 45 seconds, giving you ample time to secure the area and move on. The baton's downside is its short range — you need to be within 2 meters of your target — and the fact that it cannot be used while cloaked. However, for clearing rooms where enemies are positioned close together, the baton allows you to chain takedowns without ever firing a shot.
The Crossbow is the long-range option for players who want to eliminate threats from a distance. Its 8-meter sound radius is slightly louder than the dart gun, but the crossbow deals 60 damage per shot, enough to kill a standard guard with a chest hit. The crossbow's bolts travel fast and flat, making it accurate out to 30 meters, which is further than any other silent weapon in the game. The tradeoff is a slow 2.5-second reload and a limited ammo pool of 12 bolts. When you're planning a stealth approach that requires taking out multiple sentries from a rooftop, the crossbow is the tool for the job.
Stealth Skills That Enhance Vision Breaking
The Shadow Walker skill tree contains the passive abilities that make breaking line of sight dramatically easier. The first essential skill is Ghost Movement, which reduces your footstep sound radius by 50% when crouched. This might not sound impressive, but it means enemies can only hear you from 3 meters away instead of 6, giving you far more freedom to reposition while a guard's back is turned. The second key skill is Enhanced Perception, which extends your vision cone by 20% and highlights enemy sightlines on your HUD when you hold the focus button.
The Quick Reflexes skill reduces the time it takes for your detection meter to decay by 40%. This is arguably the most powerful stealth skill in the game because it shortens the window where enemies retain your last known position. With Quick Reflexes maxed, you can break line of sight and have your detection meter reset in just 1.2 seconds, allowing you to re-engage from a new angle before the enemy even begins searching. This skill pairs exceptionally well with the Cloak Module, because you can decloak and immediately move without worrying about residual detection.
| Skill Name | Skill Tree | Effect | Max Rank | Stealth Synergy |
|---|---|---|---|---|
| Ghost Movement | Shadow Walker | -50% footstep radius | 3 | Core for repositioning |
| Quick Reflexes | Shadow Walker | -40% detection decay time | 2 | Essential for vision breaking |
| Silent Takedown | Assassin | +50% takedown speed | 2 | Reduces vulnerability window |
| Eagle Eye | Investigator | +20% vision range | 3 | Improves enemy sightline reading |
The Silent Takedown skill in the Assassin tree reduces the animation time for takedowns by 50%, cutting the vulnerable window from 2 seconds to just 1 second. This might seem like a small improvement, but in practice it means you can execute a takedown even when a second guard is approaching from 10 meters away, because the animation finishes before the guard's vision cone sweeps your position. The skill also allows you to move at 50% speed while performing a takedown, letting you drag a body into cover without breaking your stealth approach.
The Eagle Eye skill in the Investigator tree extends your vision range by 20% and adds a subtle color tint to enemies that are about to spot you. When an enemy's detection meter reaches 80%, they flash orange on your HUD, giving you a clear warning that you're about to be detected. This early warning system lets you break line of sight a full second before the meter fills, which is often the difference between a clean escape and a chaotic firefight. For players who want to combine these stealth skills with a more aggressive toolkit, the weapon upgrades guide covers how to mod your silenced pistol for maximum effectiveness.
Room Clearing Strategies with Vision Breaks
Clearing a room without triggering an alarm requires a systematic approach that uses every tool at your disposal. The first step is reconnaissance — before entering any new area, find a vantage point and mark every enemy position using your focus ability. This takes about 10 seconds and gives you a complete picture of patrol routes, vision cones, and potential cover positions. With that information, you can identify the optimal entry point and the sequence of takedowns that will neutralize the room with minimal risk.
The two-phase approach works best for rooms with 3-5 enemies. In the first phase, you use a distraction tool — typically an EMP Marble or Audio Lure — to pull one or two guards away from their posts. While they investigate, you break line of sight and move to a flanking position behind the remaining guards. In the second phase, you execute silent takedowns on the isolated guards, then use their absence to create new gaps in the patrol pattern. This methodical approach takes longer than rushing in, but it eliminates the risk of a single mistake triggering a full alarm.
Scenario 1: Two guards patrolling a corridor. Place an Audio Lure on the far wall, which draws one guard toward it while the other continues his route. As the first guard investigates, break line of sight by moving behind a nearby crate, then execute a takedown when he passes your position. The second guard will notice his partner's absence within 5 seconds and move to investigate, giving you a clean window to take him down from behind.
Scenario 2: One drone and two guards in an open atrium. Use the Vision Disruptor to blind the drone for 5 seconds, then immediately break line of sight by moving behind a support pillar. While the drone is blind, use the KPD-9 Silenced Pistol to eliminate one guard with a headshot, then reposition before the drone recovers. The second guard will be alerted by the body but won't know your position, allowing you to flank and take him down while he investigates.
Scenario 3: Four guards in a warehouse with multiple levels. Start by using a Smoke Emitter on the lower level to create a hard break line of sight, then climb to the upper walkway while the guards are confused. From above, use the Crossbow to eliminate the two guards on the far side of the warehouse, then drop down and use the Stun Baton on the remaining pair. The key is to use verticality to your advantage, because enemies rarely look up unless they've been specifically alerted to a threat from above.
Frequently Asked Questions
How do I break line of sight quickly in NEO BERLIN 2087?
The fastest way to break line of sight is to duck behind any solid object that fully blocks the enemy's vision cone—walls, crates, and pillars all work, but you must stay hidden for at least 2 seconds for the detection meter to decay. In open areas, deploy a Smoke Emitter for an instant break, even mid-chase.
What is the best distraction gadget for stealth?
The EMP Marble is the most versatile distraction because it disables electronics and draws guards within an 8-meter radius. It works in both dark and well-lit environments, and its 45-second cooldown is short enough to use multiple times per mission. The Audio Lure is better for isolating a single guard from a pair.
Can I use the silenced pistol without alerting nearby enemies?
The KPD-9 Silenced Pistol has a 12-meter sound radius, so enemies outside that range won't hear the shot. However, enemies within the radius will investigate the noise, so you need to break line of sight immediately after firing. A headshot eliminates the target instantly, but a body shot leaves the enemy alive and alerting others.
Which stealth skill is most important for breaking vision?
Quick Reflexes is the most impactful stealth skill because it reduces detection meter decay time by 40%. This shortens the window where enemies retain your last known position, letting you reposition faster and re-engage from new angles. Ghost Movement is a close second because it halves your footstep noise when crouched.
How do I deal with security drones that ignore darkness?
Security drones have a 90-degree vision cone and a 25-meter detection range, and they ignore darkness penalties entirely. Use the Vision Disruptor gadget to blind them for 5 seconds, or the EMP Marble to disable them temporarily. The Cloak Module also works, but you need to stay at least 3 meters away from the drone to avoid heat detection.